Introduction

In software development, Travis-web is an open-source hosted, distributed continuous integration service used to build and test projects hosted at GitHub. Travis CI is configured by adding a file named .travis.yml, which is a YAML format text file, to the root directory of the GitHub repository.

img

Prerequisites

  • You are running Ubuntu 14.04 or Linux workstation.

  • Git installed on your server, which you can do by following the How To Install Git with Apt.

  • An account on GitHub, which is a Git repository host.

  • You have to create a valid credential access for https://console.VirtEngine.com.

  • You have to install openssh-server for ssh access.

      sudo apt-get install openssh-server
    
  • Check SSH working properly

      ps aux | grep sshd This initial section contains everything you need to get etherpad-lite running on your server.
    

Step-1 Fork travis-web

  • Fork travis-web from here

  • You will be see the fork option in the top right corner of the git hub page.click the fork option.

  • The travisweb is forked into your git repository

Step-2 create SSHKey and launch the app

  • Then go to your VirtEngine Dashboard
  1. Click Marketplace on the top bar.Marketplace contains all the linux distros, applications, services and microservices which VirtEngine supports.

  2. Click Nodejs Icon.A window will pop up with for SSHkey options. You can create new sshkey, use an existing sshkey or upload your own sshkeys too.

  3. Pick a repository by Choose your public repository.

Let us use Github: /travisweb

  1. To launch Nodejs App.Click Create.
  • Voila ! Your App is up to date.

  • Now that you have launched your app, you might want to launch a service (database) and bind it

Start script

VirtEngine will look for a start script named `start as follows.

#!/bin/sh
 	sudo invoke-rc.d shellinabox stop
npm install -g ember-cli
 	bower install --allow-root
 	npm install -g watchman`
 	npm rebuild node-sass
 	npm install
 	ember serve

Step-3 Open Your Web browser

You can access your web page using https://IP_ADDRESS/4200
Conclusion

These are the very simple steps to launch Nodejs using travis-web. Finally using github repository and launched the travis-web to run successfully.

To deploy your App

img

Introduction

Redis is an open source (BSD licensed), in-memory data structure store, used as database, cache and message broker. It supports data structures such as strings, hashes, lists, sets, sorted sets with range queries, bitmaps, hyperloglogs and geospatial indexes with radius queries. Redis has built-in replication, Lua scripting, LRU eviction, transactions and different levels of on-disk persistence, and provides high availability via Redis Sentinel and automatic partitioning with Redis Cluster.

This tutorial will guide you in launching Redis.

Prerequisites

  • You are running Ubuntu 14.04 or Linux workstation.

  • Git installed on your server, which you can do by following the How To Install Git with Apt.

  • An account on GitHub, which is a Git repository host.

  • You have to create a valid credential for accessing https://console.VirtEngine.com. How to create an account with VirtEngine

You have to install openssh-server in your linux machine for ssh access.

$ sudo apt-get install openssh-server

To check the ssh is properly installed in our system

$ ps aux | grep sshd

Step - 1 Creating Redis

This initial section contains everything you need to get Redis and running on your server.

  • First, ensure the user can login to our console.VirtEngine.com

  • Go to the Market Places.

  • Select the Redis, A window will pop up with for CPU, storage, RAM and SSHkey options.

  • You can choose the storage size and RAM capacity.

  • You can create a new sshkey, use an existing sshkey or import your own sshkeys too.

  • Click the create button. it will create the virtual machine.

Step - 2 Accessing Redis

Next, Go to the Dashboard and click the domain name a new window is open.

  • It contains the CPU, RAM and NETWORK tab.

  • It shows the Metrics, VM Logs, IP address and SSH URL.

  • Metrics shows the CPU,RAM and NETWORK usage.

  • VM Logs shows all the running process in VM.

  • You need to access the Virtual Machine from a terminal.

  • You can download the SSH Keys from SSH Keys tab or Overview page. Use this key to login to your virtual machine using the following command,

$ ssh -i path to/ root@
  • Now, you are login into vm then start the Redis use the following command

      $ redis-server
    
  • Check if Redis is working properly is sending a PING command using redis-cli:

    $ redis-cli ping
      PONG
    

Successfully launched the vm and login into Redis.

Conclusion

These are the very simple steps to launch Redis in virtual machine.This is a good head-start for launching Redis in VirtEngine.

Deploy Redis service

Introduction

AWS OpsWorks PHP is a simple demo app that can help you get started using your favourite PHP language.

This tutorial will guide you in launching a php web application (OpsWorks) in VirtEngine.

Prerequisites

  • You are running Ubuntu 14.04 or Linux workstation.

  • Git installed on your workstation, which you can do by following the How To Install Git with Apt.

  • You have an account on GitHub, which is a Git repository host.

  • You have to create a valid credential for accessing https://console.VirtEngine.com. How to create an account with VirtEngine

  • You have to install openssh-server for ssh access.

      sudo apt-get install openssh-server
    
  • Check SSH working properly

      ps aux | grep sshd
    

This initial section contains everything you need to get OpsWorks PHP Simple Demo App and running on your server.

Step-1 Fork OpsWorks PHP Simple Demo App

  • Fork Open OpsWorks PHP Simple Demo App from https://github.com/verticeapps/php_simpleapp.git

  • You will be see the fork option in the top right corner of the git hub page.click the fork option.

  • The OpsWorks PHP Simple Demo App repository is forked into your git repository.

Step-2 Launch the app

  1. Go to VirtEngine Dashboard

  2. Click Marketplace on the top bar.Marketplace contains all the linux distros, applications, services and microservices which VirtEngine supports.

  3. Click PHP Icon.A window will pop up for your repository selection.

  4. Pick a repository by choosing your git repository.

Let us use Github: < mygithub >/php_simpleapp.git

  1. You can create new sshkey or use an existing sshkey or upload your own sshkeys too.

  2. To launch PHP App.Click Create.

  • Voila ! Your App is up to date.

  • Now that you have launched your app, you might want to launch a service (database) and bind it

Buildpack for php

We use a PHP build pack using our super cool chef-repo.

The buildpack for PHP

#!/bin/bash
#Php builder
#megam_php
local_repo=/var/www/html/currentremote_repo=https://github.com/megamsys/opsworks-demo-php-simple-app.git
megam_home=/var/lib/megam/gulp
filename=$(basename "$remote_repo")
extension="${filename##*.}"
project="${filename%.*}"
cd $megam_home
rm -r $project
git clone $remote_repo
rm -r $local_repo/*
mv ./$project/* $local_repo
cd $project
if [  -f "./$project/start" ]; then
chmod 755 ./$project/start
./$project/star
fi
service apache2 restart

Step-3 Open Your Web browser

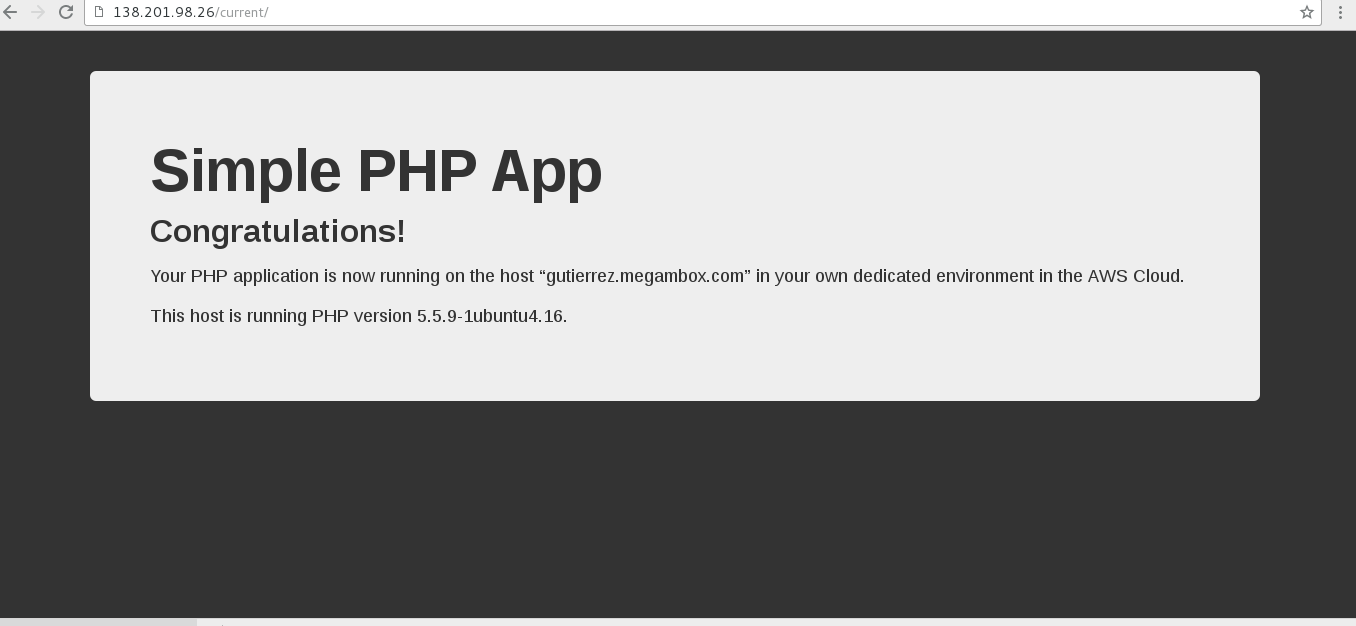
You can access your web page using https://IP_ADDRESS/current

{<1>}

Conclusion

These are the very simple steps to launch a php web app (OpsWorks PHP Simple Demo App) using github repository.

###Deploy PHP app now

Introduction

MySQL is the world’s most popular open source database. It runs on virtually all platforms, including Linux, UNIX, and Windows. Although it can be used in a wide range of applications, MySQL is most often associated with web-based applications and online publishing and is an important component of an open source enterprise stack called LAMP. It works very quickly and works well even with large data sets. MySQL uses a standard form of the well-known SQL data language.

This tutorial will guide you in launching MySQL.

Prerequisites

  • You are running Ubuntu 14.04 or Linux workstation.

  • Git installed on your server, which you can do by following the How To Install Git with Apt.

  • An account on GitHub, which is a Git repository host.

You have to create a valid credential access for https://console.VirtEngine.com.

You have to install openssh-server for ssh access.

$ sudo apt-get install openssh-server

To check the ssh is properly installed in our system

$ ps aux | grep sshd

Step - 1 Creating MySQL Virtual Machine

This initial section contains everything you need to get MySQL and running on your server.

  • First, ensure the user can login to https://console.VirtEngine.com.

  • Go to the Market Places.

  • Select the MySQL, A window will pop up with for CPU, storage, RAM and SSHkey options.

  • You can choose the storage size and RAM capacity.

  • You can create a new sshkey, use an existing sshkey or import your own sshkeys too.

  • Click the create button. it will create the virtual machine.

Step - 2 Access the MySQL in the Virtual Machine

Next, Go to the Dashboard and click the domain name a new window will open.

  • It contains the CPU, RAM and NETWORK tab.

  • It shows the Metrics, VM Logs, IP address and SSH URL.

  • Metrics shows the CPU,RAM and NETWORK usage.

  • VM Logs shows all the running process in VM.

  • You need to access the virtual machine in terminal, you can download the SSH Keys from SSH Keys tab or Overview page. Use this keys to login the terminal in following command,

$ ssh -i path to/ root@
  • Now, you are login into vm then you need to access MySQL use the following command:

      $ mysql -h 127.0.0.1 --password=megam
    

successfully launched the vm and login into MySQL.

Conclusion

This is a good head-start for launching MySQL in VirtEngine.

Deploy MySQL now

Introduction

Etherpad is a really-real time collaborative editor maintained by the Etherpad Community.Etherpad is designed to be easily embeddable and provides a HTTP API that allows your web application to manage pads, users and groups. It is recommended to use the available client implementations in order to interact with this API.

This tutorial will guide you in launching a Nodejs web application (etherpad-lite) in VirtEngine.

Prerequisites

  • You are running Ubuntu 14.04 or Linux workstation.

  • Git installed on your workstation, which you can do by following the How To Install Git with Apt.

  • You have an account on GitHub, which is a Git repository host.

  • You have to create a valid credential for accessing https://console.VirtEngine.com. How to create an account with VirtEngine

  • You have to install openssh-server for ssh access in your worstation.

      sudo apt-get install openssh-server
    
  • Check SSH working properly

      ps aux | grep sshd
    

This initial section contains everything you need to get etherpad-lite running on your server.

Step-1 Fork etherpad-lite

  • Fork etherpad-lite from https://github.com/verticeapps/node_etherpad.git

  • You will be see the fork option in the top right corner of the git hub page.click the fork option.

  • The node_etherpad is forked into your git repository

Step-2 Launch the app

  1. Go to VirtEngine Dashboard

  2. Click Marketplace on the top bar.Marketplace contains all the linux distros, applications, services and microservices which VirtEngine supports.

  3. Click Nodejs Icon.A window will pop up for your repository selection.

  4. Pick a repository by choosing your git repository.

Let us use Github: < mygithub >/node_etherpad

  1. You can create new sshkey or use an existing sshkey or upload your own sshkeys too.

  2. To Launch Nodejs App.Click Create.

  • Voila ! Your App is up to date.

  • Now that you have launched your app, you might want to launch a service (database) and bind it

Start Script

VirtEngine will look for a start script named start,
ensure that your git repository have the start script file as follows.

#!/bin/sh ./bin/run.sh –root

Step-3 Open Your Web browser

You can access your web page using https://IP_ADDRESS/9001

###Conclusion

These are the very simple steps to launch a Nodejs web app (etherpad-lite) using github repository.

Deploy Nodejs app now