Introduction

A software development kit (SDK or “devkit”) is typically a set of software development tools that allows the creation of applications for a certain software package, software framework, hardware platform, computer system, operating system, or similar development platform. To create applications, you have to download a specific software development kit.

This tutorial will set up launching sdk using c/c++, python.

Prerequisites

You have to install openssh-server for ssh access.

 sudo apt-get install openssh-server

To check the ssh is properly installed in our system

 ps aux | grep sshd

Launch SDK using c/c++

This initial section contains everything you need to get c/c++ running on your server.

  • First, ensure the user can login to https://console.VirtEngine.com.

  • Go to the Market Places, click the C/C++.

  • Select the SDK option

  • You can create new sshkey or use an existing sshkey or upload your own sshkeys too.

  • Click the Create button. it will launch the C/C++ SDK.

Step - 1 C/C++ SDK

Next, Go to your Dashboard. Click the domain name of C/C++ SDK which opens a new window.

  • It contains the CPU, RAM and NETWORK tab.

  • It shows the Metrics, VM Logs, IP address and SSH URL.

  • Metrics shows the CPU,RAM and NETWORK usage.

  • You need to access the Virtual Machine from a terminal.

  • You can download the SSH Keys from SSH Keys tab or Overview page. Use this key to login to your virtual machine using the following command,

       ssh -i path to/example@email.com_os_key root@<ipaddress>
    

Step - 2 Running C program

In the VM gcc 4.9 version in installed. To test it, create a file in hello.c

open a file to write a hello world program in c,

  #include <stdio.h>
  main()
  {
  printf("hello World");
  }

Compile the program

gcc-4.9 hello.c -o hello  Run the program

./hello

Step - 3 Running C++ program

In the VM g++ 4.9 version is installed. To test it, create a file in hello.cc.

open a file to write a hello world program in c++,

#include<iostream>
using namespace std;
main()
{
cout<<"hello world";
}

Compile the program

g++-4.9 hello.cc -o hello  Run the program

./hello

Launch SDK for Python

This initial section contains everything you need to get Python and running on your server.

  • First, ensure the user to login our websites.

  • Go to the Market Places to click the Python apps.

  • Select the SDK option

  • You can create a new sshkey, use an existing sshkey or import your own sshkeys too.

  • Click the create button. it will launch the Python app.

Step - 1 Access the Python SDK

Next, Go to the Dashboard.click the domain name of python app and open a new window.

  • It contains the CPU, RAM and NETWORK tab.

  • It shows the Metrics, VM Logs, IP address and SSH URL.

  • Metrics shows the CPU,RAM and NETWORK usage.

  • VM Logs shows all the running process in VM.

  • You need to access the Virtual Machine from a terminal.

  • You can download the SSH Keys from SSH Keys tab or Overview page. Use this key to login to your virtual machine using the following command,

       ssh -i path to/example@email.com_os_key root@<ipaddress>
    

Step - 2 Running a python program

After ssh into vm, check python version

  python --version

Create a file in hello.py.

open a file to Write a hello world program

  #! /usr/bin/python
  print 'hello world!'

Change the file permission into a file

chmod 755 hello.py

Run the program

./hello.py

Conclusion

These are the very simple steps to launch SDK using C/C++/Python.

Deploy your C/C++/Python SDK now

<a href=”https://console.VirtEngine.com”target=”_blank”> wordpres button

Introduction

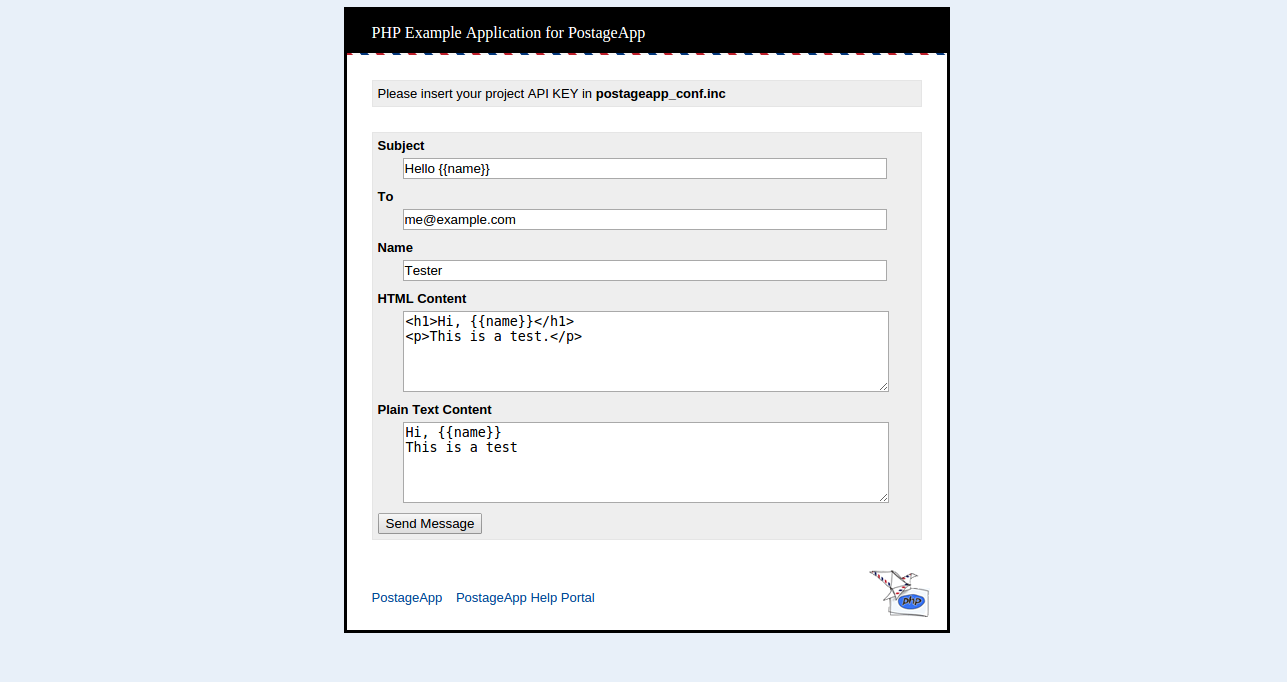
The PostageApp is used in quick way to deliver the email. This application supports PHP.It optionally attachs it to the mail server.

This tutorial will guide you in launching a php web application (PostageApp) in VirtEngine.

<a href=”https://console.VirtEngine.com”target=”_blank”> //wordpres button</a>
Prerequisites

  • You are running Ubuntu 14.04 or Linux workstation.

  • Git installed on your workstation, which you can do by following the How To Install Git with Apt.

  • You have an account on GitHub, which is a Git repository host.

  • You have to create a valid credential for accessing https://console.VirtEngine.com. How to create an account with VirtEngine

  • You have to install openssh-server for ssh access in your local system.

      sudo apt-get install openssh-server
    

check SSH installed on your system

    ps aux | grep sshd

Step-1 Fork PostageApp

  • Fork PostageApp from https://github.com/verticeapps/php_postage.git

  • You will be see the fork option in the top right corner of the git hub page.click the fork option.

  • The php_postage repository is forked into your git repository

Step - 2 Launch PostageApp

  1. Go to VirtEngine Dashboard

  2. Click Marketplace on the top bar.Marketplace contains all the linux distros, applications, services and microservices which VirtEngine supports.

  3. Click PHP Icon.A window will pop up for your repository selection.

  4. Pick a repository by choosing your repository.

Let us use Github: < mygithub >/php_postage.git

  1. You can create new sshkey, use an existing sshkey or upload your own sshkeys too.

  2. Launch PHP App.Click Create.

  • Voila ! Your App is up to date.

  • Now that you have launched your app, you might want to launch a service (database) and bind it

    Step - 2 Buildpack for php

We use a default PHP build pack using our super cool chef-repo.

  #!/bin/bash
  #Php builder
  #megam_php
  local_repo=/var/www/html/current
  remote_repo=https://github.com/verticeapps/php_postage.git
  megam_home=/var/lib/megam/gulp
  filename=$(basename "$remote_repo")
  extension="${filename##*.}"
  project="${filename%.*}"
  cd $megam_home
  rm -r $project
  git clone $remote_repo
  rm -r $local_repo/*
  mv ./$project/* $local_repo
  cd $project
  if [  -f "./$project/start" ]; then
  chmod 755 ./$project/start
  ./$project/start
  fi
  service apache2 restart

Step - 3 Open Your Web Browser

You can access your web page using https://IP_ADDRESS/current

Voila ! Your App is up to date. ####Conclusion These are the very simple steps to launch a php web app (PostageApp) using github repository.

Deploy PHP app now

<a href=”https://console.VirtEngine.com”target=”_blank”> //wordpres button</a>

Introduction

Jenkins is the leading open-source automation server. Built with Java, it provides over 1000 plugins to support automating virtually anything, so that humans can actually spend their time doing things machines cannot.

This tutorial will guide you in launching a J2EE web application () in VirtEngine.

Prerequisites

You have to install openssh-server for ssh access.

sudo apt-get install openssh-server

Check SSH working properly

ps aux | grep sshd

In this tutorial you will see the steps to launch the J2EE using jenkins

Step-1 Fork jenkins

  • Fork jenkins from https://github.com/verticeapps/java_jenkins.git

  • You will be see the fork option in the top right corner of the git hub page.click the fork option.

  • The jenkins repository is forked into your git repository

Step-2 Launch the app

  1. Go to VirtEngine Dashboard

  2. Click Marketplace on the top bar.Marketplace contains all the linux distros, applications, services and microservices which VirtEngine supports.

  3. Click Java Icon.A window will pop up for your repository selection.

  4. Pick a repository by choosing your repository.

Let us use Github: < mygithub >/java_jenkins.git

  1. You can create new sshkey, use an existing sshkey or upload your own sshkeys too.

  2. Launch Java App.Click Create.

  • Voila ! Your App is up to date.

  • Now that you have launched your app, you might want to launch a service (database) and bind it

*Rember that when you select memory its upto 2GB

Buildpack for java

Java’s default build pack get’s going by kicking of maven. We plan to support ant, gradle in the future

#!/bin/bash
megam_home="/var/lib/megam/gulp"
local_repo="/home/megam/tomcat/webapps"
remote_repo="https://github.com/vinomca-megam/jenkins.git"
filename=$(basename "$remote_repo")
extension="${filename##*.}"
filename="${filename%.*}"

  rm $local_repo/*.war
  cd $megam_home
  rm -r $filename
  git clone $remote_repo
  cd $filename
  mvn clean
  mvn install -Dmaven.test.skip=true -U
stop java
start java

Step-3 Open Your Web browser

You can access your web page using https://IP_ADDRESS:8080

Then the below UI will be open

Select the Manager App.It asks User Name and Password Username and password is "megam"

Here you will click the jenkins link.

  • (or) the url to launch jenkins https://IP_ADDRESS:8080/jenkins

Conclusion

These are the very simple steps to launch a J2EE web app (jenkins) using github repository.

Deploy Java app now

Introduction

Ubuntu is a Debian-based Linux operating system and distribution for personal computers, smartphones and network servers. It uses Unity as its default user interface. It is based on free software and named after the Southern African philosophy of ubuntu.

This tutorial will guide you in setting up a Ubuntu 14.04 VM in VirtEngine.

Prerequisites

  • You are running Ubuntu 14.04 or Linux workstation.

  • Git installed on your server, which you can do by following the How To Install Git with Apt.

  • An account on GitHub, which is a Git repository host. To follow this tutorial :

  • You have to create a valid credential for accessing https://console.VirtEngine.com. How to create an account with VirtEngine

You have to install openssh-server for ssh access.

$ sudo apt-get install openssh-server

To check the ssh is properly installed in our system

$ ps aux | grep sshd

Step - 1 Creating Ubuntu VM

This initial section contains everything you need to get Ubuntu and running on your server.

First, ensure the user can login to https://console.VirtEngine.com.

  • Go to the Market Places.

  • Select the Ubuntu, A window will pop up with for CPU, storage, RAM and SSHkey options.

  • You can choose the storage size, RAM capacity.

  • You can Create a new sshkey, use an existing sshkey or import your own sshkeys too.

  • click the Create button. it will create the virtual machine.

Step - 2 Access the Ubuntu VM

Next, Go to the Dashboard and click the domain name a new window will open.

  • It contains the CPU, RAM and Network tab.

  • It shows the Metrics, VM Logs, IP address and SSH URL.

  • Metrics shows the CPU,RAM and Network usage.

  • VM Logs shows all the running process in VM.

  • You need to access the Virtual Machine from a terminal.

  • You can download the SSH Keys from SSH Keys tab or Overview page. Use this key to login to your virtual machine using the following command,

      $ ssh -i path to/<private_key filename> root@<ipaddress>
    

Conclusion

These are the very simple steps to launch Ubuntu virtual machine. This is a good head-start for launching a Ubuntu in VirtEngine.

Deploy your Ubuntu VM now

Introduction

Spring Web Flow facilitates building the j2EE based web applications that require guided navigation – e.g. a shopping cart, flight check-in, a loan application, and many others. In contrast to stateless, free-form navigation such use cases have a clear start and end point, one or more screens to go through in a specific order, and a set of changes that are not finalized to the end.

This tutorial will guide you in launching a J2EE web application (spring-webflow) in VirtEngine.

###Prerequisites

You have to install openssh-server for ssh access.

sudo apt-get install openssh-server Check SSH working properly

ps aux | grep sshd In this tutorial you will see the steps to launch the J2EE using Spring-webflow application.

###Step-1 Fork spring web-flow

  • To fork spring web-flow https://github.com/verticeapps/java_springwebflow.git

  • You will be see the fork option in the top right corner of the git hub page.click the fork option.

  • The spring web-flow repository is forked into your git repository.

###Step-2 Launch the app

  1. Go to VirtEngine Dashboard

  2. Click Marketplace on the top bar.Marketplace contains all the linux distros, applications, services and microservices which VirtEngine supports.

  3. Click Java Icon.A window will pop up for your git repository selection.

  4. Pick a repository by choosing your repository.

Let us use Github: < mygithub >/java_springwebflow.git

  1. You can create new sshkey or use an existing sshkey or upload your own sshkeys too.

  2. To launch J2EE App.Click Create.

  • Voila ! Your App is up to date.

  • Now that you have launched your app, you might want to launch a service (database) and bind it

*Rember that when you select memory its upto 2GB

####Buildpack for Java

Java’s default build pack get’s going by kicking of maven. We plan to support ant, gradle in the future

#!/bin/bash
#Java builder WAR

#megam_java_builder/build tomcat

megam_home="/var/lib/megam/gulp"
local_repo="/home/megam/tomcat/webapps"
remote_repo="https://github.com/vinomca-megam/spring-webflow-samples.git"

filename=$(basename "$remote_repo")
extension="${filename##*.}"
filename="${filename%.*}"

  rm $local_repo/*.war
  cd $megam_home
  rm -r $filename
  git clone $remote_repo
  cd $filename
  mvn clean
  mvn install -Dmaven.test.skip=true -U

stop java
start java

###Step-3 Open Your Web browser You can access your web page using https://IP_ADDRESS:8080

You will show the below UI

Select the Manager App.It asks User Name and Password Username and password is "megam"

Then the below UI will be open

Here you will click the webflow show case link.

###Conclusion

These are the very simple steps to launch a J2EE web app (spring-webflow) using github repository.

###Deploy Java app now