NSQd A reatime distributed light weight messaging platform.

We have used RabbitMQ heavily in clustered mode. Lately we have found issues with file description(fd) limit getting reached even after bumping the ulimit or closing sockets after publishing in the queue.

We have tried single publisher to reuse socket connection but RabbitMQ hangs periodically.

We set out to cleanup our code and hunt for a new pub sub guy.

No wonder several players in the cloud market invent their own queue system, choices like nats pioneered by apcera, zeromq, nsq.io by bit.ly

We choose nsq for it distributed realtime platform with no single point of failure (SPOF), it has its own service discovery mechanism and its written in golang, has drivers for every language.

We wrote our own wrappers for NSQ - scala and NSQ - golang by crackcom

Installation

This is pretty quick for your local setup

$ wget https://s3.amazonaws.com/bitly-downloads/nsq/nsq-0.3.6.linux-amd64.go1.5.1.tar.gz

Untar the tarball into ~/bin folder Upon untarring ensure that the ~/bin folder has all the files named nsq_

Start the following daemons

$ nsqlookupd &

$ nsqd --lookupd-tcp-address=127.0.0.1:4160

$ nsqadmin --lookupd-http-address=127.0.0.1:4161

$ curl -d 'hello world 1' 'https://127.0.0.1:4151/put?topic=test'

Watch topic ‘test’

$ nsq_to_tail --topic=test --lookupd-http-address=127.0.0.1:4161

Dump topic ‘test’ in a file

$ nsq_to_file --topic=test --output-dir=/tmp --lookupd-http-address=127.0.0.1:4161

Running nsq in production

Definitely clustering and adding more nsqds becomes a need using a service discovery mechanism.

We have built packages to handle them megamnsqd.

The topology we will use is a service discovery daemon nsqlookupd clustered using mutiple nsqd

Machine 1

Do the due deligence by adding get.megam.io repo.

 $ apt-get install megamnsqd

There are two services nsqd and nslookupd we will use.

At the end of the install the services are not running.

A private ip shall be present in /var/lib/megam/env.sh named MEGAM_NSQLOOKUP_IP

As you noticed from the above nsqd needs the nsqlookupd's ip addresss during clustering.

Start the daemons

$ service start nslookupd

$ service start nsqd

As a webui is optional, there is not upstart or systemd file for it.

You can even run nsqadmin poiting to the lookupd address from your local laptop.

$ nsqadmin --lookupd-http-address=<MACHINE1_IP:4161>

Type https://MACHINE1_IP:4171 for the web ui.

Machine 2

Do the due deligence by adding get.megam.io repo.

 $ apt-get install megamnsqd

We will use only nsqd here

At the end of the install the service isn’t running and needs manual start.

A private ip shall be present in /var/lib/megam/env.sh named MEGAM_NSQLOOKUP_IP

As you noticed from the above nsqd needs the nsqlookupd's ip addresses during clustering.

Change the MEGAM_NSQLOOKUP_IP=MACHINE1_IP in /var/lib/megam/env.sh

Start the daemon

$ service start nsqd

As a webui is optional, there is not upstart or systemd file for it.

Type https://MACHINE1_IP:4171 for the web ui in your local machine.

You will see two machines in the UI.

You might see a line ERR <number> IO Error EOF in our daemons megamd or gulpd then indicate that the readLoop in go-nsq detected an end of file, which can be safely ignored.

Redudant nslookupd

This is something the infra team can investigate to scale and avoid SPOF for the service discovery mechanism.

The performance is sweet and pretty good.

The moral of the story is language virtual machines are a legacy (Erlang, Java …) and nimble native daemons can be a bold/better choice for performance and scalability.

Our need is to setup opennebula in hetzner, so we have two servers, one is for opennebula-frontend and another one is for opennebula-host. We don’t face any problem in opennebula front-end.

But in opennebula-host server, we face some networking problems.

We have a local working server for opennbula-host with openvswitch. But in hetzner openvswitch makes some problem.

After trying many configuration, we succeed with the following configurations,

OS : Ubuntu-14.04(trusty)

NOTE Actually we have public ips, but for security issues i documented local ips

Host ip : 192.168.1.100

For vms, i got subnet ips

Subnet: 192.168.2.96/27
Useable ips : 192.168.2.97 to 192.168.2.126

NOTE Create bridge (one) after adding the below configuration in the interface file

My Host server network configuration

# cat /etc/network/interfaces
### Hetzner Online GmbH - installimage
# Loopback device:
auto lo
iface lo inet loopback

# device: eth0
auto  eth0
iface eth0 inet static
  address   192.168.1.100
  netmask   255.255.255.224
  gateway   192.168.1.1
  up route add -net 192.168.1.0 netmask 255.255.255.224 gw 192.168.1.1 eth0

iface eth0 inet6 static
  address 2xxx:xx:xxx:xxxx::x
  netmask 64
  gateway fe80::1

auto one
iface one inet static
  address   192.168.1.100
  netmask   255.255.255.224
  bridge_ports none
  bridge_stp off
  bridge_fd 1
  bridge_hello 2
  bridge_maxage 12

  #subnet
  up ip route add 192.168.2.96/27 dev one
  up ip route add 192.168.2.97/27 dev one
  up ip route add 192.168.2.98/27 dev one
  up ip route add 192.168.2.99/27 dev one
  up ip route add 192.168.2.100/27 dev one
  up ip route add 192.168.2.101/27 dev one
  up ip route add 192.168.2.102/27 dev one
  up ip route add 192.168.2.103/27 dev one
  up ip route add 192.168.2.104/27 dev one

Routing table for host server

root@ec2 ~ # route
Kernel IP routing table
Destination     Gateway         Genmask         Flags Metric Ref    Use Iface
default         static.1.1.168. 0.0.0.0         UG    0      0        0 eth0
192.168.1.0     static.1.1.168. 255.255.255.224 UG    0      0        0 eth0
192.168.1.0     *               255.255.255.224 U     0      0        0 eth0
192.168.1.0     *               255.255.255.224 U     0      0        0 one
192.168.2.96  *               255.255.255.224 U     0      0        0 one

IP routes

root@ec2 ~ # ip route show
default via 192.168.1.1 dev eth0
192.168.1.0/27 via 144.xx.xx.1 dev eth0
192.168.1.0/27 dev eth0  proto kernel  scope link  src 192.168.1.100
192.168.1.0/27 dev one  proto kernel  scope link  src 192.168.1.100
192.168.2.96/27 dev one  scope link

open /etc/sysctl.conf and uncomment these lines

net.ipv4.conf.all.rp_filter=1
net.ipv4.ip_forward=1
net.ipv6.conf.all.forwarding=1

Delete default bridge virbr0

$ virsh net-destroy default
$ virsh net-undefine default
$ service libvirtd restart

First we tried openvswitch, then we remove all ports & bridges from openvswitch

root@ec2 ~ # ovs-vsctl show
835b086b-286b-448c-83f4-1d7526a9954e
    ovs_version: "2.0.2"

Then we tried normal linux-bridge. After launching vm, our linux bridge status

root@ec2 ~ # brctl show
bridge name	bridge id		STP enabled	interfaces
one		8000.fe0094fbd663	no		vnet0

root@ec2 ~ # ifconfig
eth0      Link encap:Ethernet  HWaddr 8c:89:a5:15:6f:e4  
      inet addr:192.168.1.100  Bcast:192.168.1.31  Mask:255.255.255.224
      inet6 addr: 2xxx:xx:xxx:xxxx::x/64 Scope:Global
      inet6 addr: xxxx::xxxx:xxxx:xxxx:xxxx/64 Scope:Link
      UP BROADCAST RUNNING MULTICAST  MTU:1500  Metric:1
      RX packets:10285 errors:0 dropped:0 overruns:0 frame:0
      TX packets:11418 errors:0 dropped:0 overruns:0 carrier:0
      collisions:0 txqueuelen:1000
      RX bytes:2408774 (2.4 MB)  TX bytes:3191410 (3.1 MB)

lo        Link encap:Local Loopback  
      inet addr:127.0.0.1  Mask:255.0.0.0
      inet6 addr: ::1/128 Scope:Host
      UP LOOPBACK RUNNING  MTU:65536  Metric:1
      RX packets:588417 errors:0 dropped:0 overruns:0 frame:0
      TX packets:588417 errors:0 dropped:0 overruns:0 carrier:0
      collisions:0 txqueuelen:0
      RX bytes:1387023327 (1.3 GB)  TX bytes:1387023327 (1.3 GB)

one      Link encap:Ethernet  HWaddr 8c:89:a5:15:6f:e4  
      inet addr:192.168.1.100  Bcast:192.168.1.31  Mask:255.255.255.224
      inet6 addr: 2xxx:xx:xxx:xxxx::x/64 Scope:Global
      inet6 addr: xxxx::xxxx:xxxx:xxxx:xxxx/64 Scope:Link
      UP BROADCAST RUNNING MULTICAST  MTU:1500  Metric:1
      RX packets:2098 errors:0 dropped:0 overruns:0 frame:0
      TX packets:983 errors:0 dropped:0 overruns:0 carrier:0
      collisions:0 txqueuelen:0
      RX bytes:167718 (167.7 KB)  TX bytes:44679 (44.6 KB)

vnet0     Link encap:Ethernet  HWaddr fe:00:94:fb:d6:63  
      inet6 addr: xxxx::xxxx:xxxx:xxxx:xxx/64 Scope:Link
      UP BROADCAST RUNNING MULTICAST  MTU:1500  Metric:1
      RX packets:2098 errors:0 dropped:0 overruns:0 frame:0
      TX packets:749 errors:0 dropped:0 overruns:0 carrier:0
      collisions:0 txqueuelen:500
      RX bytes:197090 (197.0 KB)  TX bytes:34851 (34.8 KB)

Thats it for opennebula host server’s network configuration.

Now launch a vm from opennebula

VM’s network configuration for Ubuntu
root@vm1:~# cat /etc/network/interfaces
auto lo
iface lo inet loopback

auto eth0
iface eth0 inet static
  address 192.168.2.97
  network 192.168.2.0
  netmask 255.255.255.224
  gateway 192.168.1.100
  pointopoint 192.168.1.100

Vm’s routing table

root@vm1:~# route
Kernel IP routing table
Destination     Gateway         Genmask         Flags Metric Ref    Use Iface
default         100.1.168.192.in 0.0.0.0         UG    0      0        0 eth0
100.1.168.192.in *               255.255.255.255 UH    0      0        0 eth0

ip route

root@vm1:~# ip route show
default via 192.168.1.100 dev eth0
192.168.1.100 dev eth0  proto kernel  scope link  src 192.168.2.97

Now i can connect with my vm from anywhere.

VM’s network configuration for CoreOS

Virutal Machine OS : CoreOS-835.13.0

VM’s network configuration

root@vm1:~# cat  /etc/systemd/network/static.network
[Match]
Name=ens3

[Network]
Address=192.168.3.99/27
Gateway=192.168.1.100
DNS=8.8.8.8
DNS=8.8.4.4

[Address]
Address=192.168.2.99/27
Peer=192.168.1.100

Vm’s routing table

root@vm1:~# route
Kernel IP routing table
Destination     Gateway         Genmask         Flags 	Metric Ref    Use Iface
default         192.168.1.100  0.0.0.0         UG    0      0        0 ens3
192.168.1.100  *        255.255.255.255 UH    0      0        0 ens3
192.168.2.0    *         255.255.255.224 U     0      0        0 ens3
172.17.0.0     *         255.255.0.0     U     0      0        0 docker0

root@vm1:~# ip route show
default via 192.168.1.100 dev ens3
192.168.1.100 dev ens3  scope link
192.168.2.0/27 dev ens3  proto kernel  scope link  src 192.168.2.99
172.17.0.0/16 dev docker0  proto kernel  scope link  src 172.17.0.1

WHAT IS A RUBY GEM?

A gem is essentially a Ruby plugin. RubyGems is a package manager for the Ruby programming language that provides a standard format for distributing Ruby programs and libraries, a tool designed to easily manage the installation of gems, and a server for distributing them.

WHY USE GEM?

(Interesting question. Let’s see why.)

Before we get into the “how” of creating a gem, let’s first consider why you might want to do so.

One of the most obvious reasons relates to code reuse.

If you find yourself implementing the same feature over and over again across projects, there’s a good chance that you’ve found the need for a gem.

Additionally, releasing a gem as open-source provides others the opportunity to contribute by adding features, addressing issues that you might have overlooked, and generally making your gem provide an all-around better experience for its users.

HOW DO YOU BUILD A GEM?

To help us create the gem, we’ll use the popular bundler

bundler gem <gem_name>

Bundler is primarily designed to help you manage a project’s dependencies.

If you’ve not used it before, then don’t worry because we’ll be taking advantage of a lesser known feature anyway, which is its ability to generate a gem boilerplate. (

It also provides some other tools that will help us manage our gem’s packaging).

Let’s begin by installing bundler:

gem install bundler

Once Bundler is installed, we can use it to create our gem.

To begin to create a gem using Bundler named megam_api, use the bundle gem command like this:

bundle gem megam_api

create gem megam_api

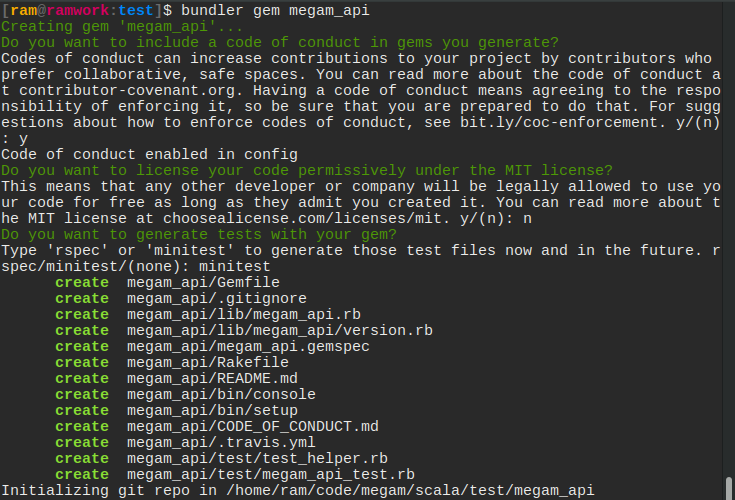
We call our gem megam_api because this gem is going to do a couple of things around Megam cloud platfom such as magically launch an app in cloud or “suck in cloud!”.

This command creates a scaffold directory for our new gem. The files generated are:

Gemfile: Used to manage gem dependencies for our library’s development. This file contains a gemspec line meaning that Bundler will include dependencies specified in megam_api.gemspec too.

Rakefile: Requires Bundler and adds the build, install and release Rake tasks by way of calling Bundler::GemHelper.install_tasks. The build task will build the current version of the gem and store it under the pkg folder, the install task will build and install the gem to our system (just like it would do if we gem install’d it) and release will push the gem to Rubygems for consumption by the public.

.gitignore: (only if we have Git). This ignores anything in the pkg directory (generally files put there by rake build), anything with a .gem extension and the .bundle directory.

megam_api.gemspec: The Gem Specification file. This is where we provide information for Rubygems’ consumption such as the name, description and homepage of our gem. This is also where we specify the dependencies our gem needs to run.

lib/megam_api.rb: The main file to define our gem’s code. This is the file that will be required by Bundler (or any similarly smart system) when our gem is loaded. This file defines a module which we can use as a namespace for all our gem’s code. It’s best practice to put our code in…

lib/megam: here. This folder should contain all the code (classes, etc.) for our gem. The lib/megam_apie.rb file is there for setting up our gem’s environment, whilst all the parts of it go in this folder. If our gem has multiple uses, separating this out so that people can require one class/file at a time can be really helpful.

lib/megam/api/version.rb: Defines a Megam api module and in it, a VERSION constant. This file is loaded by the megam_api.gemspec to specify a version for the gem specification. When we release a new version of the gem we will increment a part of this version number to indicate to Rubygems that we’re releasing a new version.

There’s our base and our layout, now get developing!

TESTING YOUR GEM:

We’re going to use minitest to test our gem.

-We write tests to ensure that everything goes according to plan and to prevent future-us from building a time machine to come back and kick our asses.

-To get started with writing our tests, we’ll create a test directory at the root of gem by using the command:

mkdir test

-Next, we’ll specify in our megam_api.gemspec file that minitest is a development dependency by adding this line inside theGem::Specification block:

spec.add_development_dependency "minitest", "~> 5.8"

-Because we have the gemspec method call in our Gemfile, bundler will automatically add this gem to a group called “development” which then we can reference any time we want to load these gems with the following line:

 Bundler.require(:default, :development)`

-The benefit of putting this dependency specification inside of megam_api.gemspec rather than the Gemfile is that anybody who runs

  gem install megam_api --dev

will get these development dependencies installed too.

This command is used for when people wish to test a gem without having to fork it or clone it from GitHub.

-When we run bundle install, minitest will be installed for this library and any other library we use with bundler, but not for the system. This is an important distinction to make: any gem installed by Bundler will not muck about with gems installed by gem install. It is effectively a sandboxed environment.

-By running bundle install, bundler will generate the extremely important Gemfile.lock file. This file is responsible for ensuring that every system this library is developed on has the exact same gems so it should always be checked into version control.Additionally in the bundle install output, we will see this line:

Using megam_api (0.99) from source at /path/to/megam_api`

Bundler detects our gem, loads the gemspec and bundles our gem just like every other gem.

We can write our first test with this framework now in place.

For testing, create a new test file for every api (accounts to startwith) we want to test at the root of the test directory.

When we run ruby test_accounts.rb

require File.expand_path("#{File.dirname(__FILE__)}/test_helper")

class TestAccounts < MiniTest::Unit::TestCase

  $admin = "admin-tom"
  $normal = "normal-tom"
  $tom_email = "tom@gomegam.com"
  $bob_email = "bob@gomegam.com"

  def test_get_accounts_good
    response =megams.get_accounts(sandbox_email)
    response.body.to_s
    assert_equal(200, response.status)
  end

  def test_post_accounts_good
    tmp_hash = {
      "id" => "000099090909000",
      "first_name" => "Darth",
      "last_name" => "Vader",
      "email" => "coolvader@iamswag.com",
      "phone" => "19090909090",
      "api_key" => "IamAtlas{74}NobdyCanSedfefdeME#07",
      "authority" => "admin",
      "password" => "",
      "password_reset_key" => "",
      "password_reset_sent_at" => "",
      "created_at" => "2014-10-29 13:24:06 +0000"
      }
    response =megams.post_accounts(tmp_hash)
    response.body.to_s
    assert_equal(201, response.status)
  end

end

To load this file, we’ll need to add a require line to lib/megam_api.rb for it: require ‘megam_api/api/accounts’

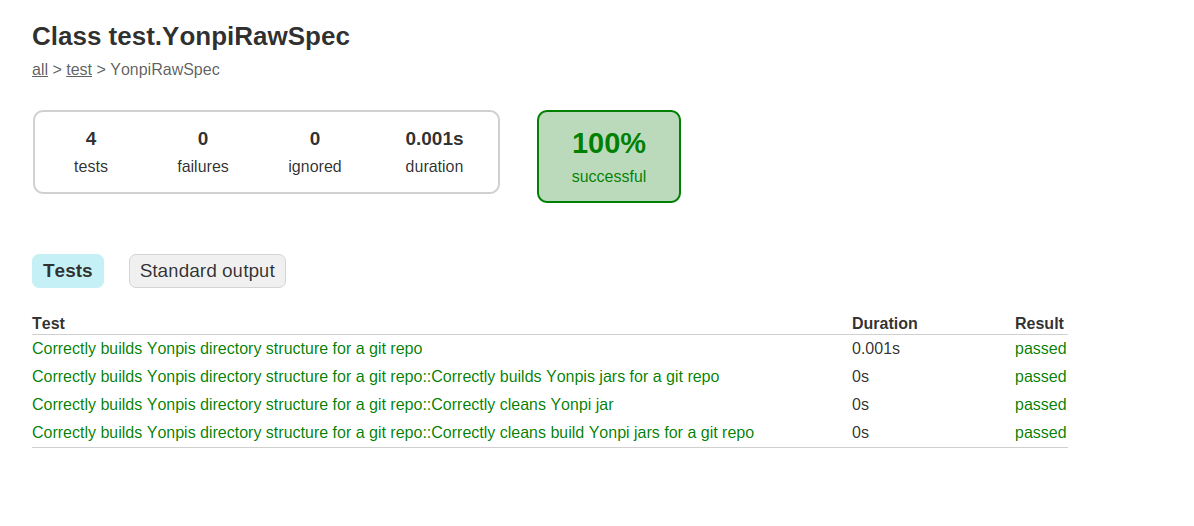
When we run our specs with ruby test_accounts.rb this test will pass: 2 example, 0 failures

Great success! If we’re using Git (or any other source control system), this is a great checkpoint to commit our code. Always remember to commit often! It’s all well and dandy that we can write our own code.

PUBLISHING TO RUBYGEMS.ORG

The simplest way to distribute a gem for public consumption is to use RubyGems.org.

Gems that are published to RubyGems.org can be installed via the gem install command or through the use of tools such as Isolate or Bundler.

Create an account with rubygems.org

Register at [rubygems.org](https://rubygems.

Create a credentials file with the api_key

ram@ramwork:.gem]$ pwd
/home/ram/.gem

[ram@ramwork:.gem]$ ls
credentials  ruby/  specs/

[ram@ramwork:.gem]$ cat credentials
---
:rubygems_api_key: 8690909090909090909090afdasfasdf90

Build a gem

cd megam_api

gem build megam_api.gemspec

Successfully built RubyGem
Name: megam_api
Version: 0.90
File: megam_api-0.90.gem

Push your gem to rubygems.org


gem push megam_api-0.99.gem

Voila

You are done. Go ahead and hack your own gem.

Installing gradle

We have decided to gradually migrate all our projects to gradle from sbt due to its performance.

In our recent sparkbuilder project we found a need to natively build jars for our analytic prediction templates - We call us Yonpi [Yet ANother PlugIn]

Here we will look at installing gradle and setting up a scala project and publishing it to bintray.

Download grade

Dowload and untar the zip gradle

Environment variable

Setup the PATH environment variable by appending GRADLE_HOME/bin

There may be packages for your distro (ubuntu, or archlinux)

In Archlinux


yaourt gradle

Your first scala project sparkbuilder

build.gradle

The build recipe for gradle resides here.

src/main/scala:

Contains the scala source code.

Gradle provide a plugin for scala projects, just include the line in your build.gradle as apply plugin: scala


apply plugin: scala

Here is our full gradle file.


apply plugin: 'scala'

repositories {
    maven {
      url 'https://repo.gradle.org/gradle/libs-releases-local'
    }

    maven {
      url 'https://dl.bintray.com/megamsys/scala'
    }

    mavenCentral()
}

dependencies {
  compile 'org.scala-lang:scala-library:2.11.7'
}

def toolingApiVersion = gradle.gradleVersion

dependencies {
    compile "org.gradle:gradle-tooling-api:${toolingApiVersion}"
    compile 'io.megam:libcommon_2.11:0.20'
    compile 'org.scalaz:scalaz-core_2.11:7.1.5'
    testCompile 'junit:junit:4.5'
    testCompile 'org.specs2:specs2-core_2.11:3.6.5-20151112214348-18646b2'
    testCompile 'org.specs2:specs2-junit_2.11:3.6.5-20151112214348-18646b2'
    testCompile 'org.specs2:specs2-matcher-extra_2.11:3.6.5-20151112214348-18646b2'
    runtime 'org.slf4j:slf4j-simple:1.7.10'
}


To start from the top.

repositories

Add the repositories you want gradle to download jars


repositories {
    maven {
      url 'https://repo.gradle.org/gradle/libs-releases-local'
    }

    maven {
      url 'https://dl.bintray.com/megamsys/scala'
    }

    mavenCentral()
}

In the above we use a library from bintray.com/megamsys/scala, and also will be using gradle tooling api to build scala code (yonpi)

dependencies

Add the dependencies you want sparkbuilder to use. We will use the following apis.

  • gradle-tooling
  • scalaz
  • megam:libcommon

For tests we will use

  • junit
  • specs2

dependencies {
    compile "org.gradle:gradle-tooling-api:${toolingApiVersion}"
    compile 'io.megam:libcommon_2.11:0.20'
    compile 'org.scalaz:scalaz-core_2.11:7.1.5'
    testCompile 'junit:junit:4.5'
    testCompile 'org.specs2:specs2-core_2.11:3.6.5-20151112214348-18646b2'
    testCompile 'org.specs2:specs2-junit_2.11:3.6.5-20151112214348-18646b2'
    testCompile 'org.specs2:specs2-matcher-extra_2.11:3.6.5-20151112214348-18646b2'
    runtime 'org.slf4j:slf4j-simple:1.7.10'
}

CompileScala

Lets compile our source code.


gradle build

The above does a compile and test of scala code.

Testing using spec2 and gradle

specs2 isn’t quite friendly as in sbt

So to make it work we will need to add these dependencies for using specs2

Yes, JUnit is needed


testCompile 'junit:junit:4.5'
    testCompile 'org.specs2:specs2-core_2.11:3.6.5-20151112214348-18646b2'
    testCompile 'org.specs2:specs2-junit_2.11:3.6.5-20151112214348-18646b2'
    testCompile 'org.specs2:specs2-matcher-extra_2.11:3.6.5-20151112214348-18646b2'

Let us create our first YonpiRawSpecs.scala file. You’ll notice that on top of the class you will need @RunWith(classOf[JUnitRunner]) to run your specs2.


package test

import org.specs2.mutable._
import org.specs2.Specification
import java.net.URL
import org.specs2.matcher.MatchResult
import org.specs2.execute.{ Result => SpecsResult }

import io.megam.gradle._
import org.megam.common.git._
import org.junit.runner.RunWith
import org.specs2.mutable.SpecificationWithJUnit
import org.specs2.runner.JUnitRunner
import org.slf4j.LoggerFactory

@RunWith(classOf[JUnitRunner])
class YanpiRawSpec extends Specification {

  def is =
    "YanpiRawSpec".title ^ end ^ """
  YanpiRawSpec is the implementation that build the git repo
  """ ^ end ^
      "The Client Should" ^
      "Correctly build Yonpis for a git repo" ! Yanpi.succeeds ^
      end

  case object Yanpi {

      def succeeds: SpecsResult = {
      val yp =   YanpiProject(new GitRepo("local", "https://github.com/megamsys/sparkbuilder.git"))
      println ("yp.name0 ="+yp.name0)
      println ("yp.root0 ="+yp.root0)
      println ("yp.jar0 ="+yp.jar0)

      yp.name0  == "sparkbuilder"
      yp.root0  == "/home/megam/code/megam/home/megamgateway/sparkbuilder"
      yp.jar0 == "/home/megam/code/megam/home/megamgateway/sparkbuilder/build/sparkbuilder.jar"
    }
  }

}


Running tests

Kickoff the specs to see if they pass


gradle test

Megam spec passes

Publishing to bintray

Register and get the credentials of bintray.

Create ./bintray/credentials with the following value. Your password might be different.

realm = Bintray API Realm
host = api.bintray.com
user = megamio
password = fake8080808080808080

Modify your build.gradle to load the properties file


apply plugin: 'com.jfrog.bintray'

ext.bintray = new Properties()
bintray.load(new FileInputStream("$System.env.HOME" + "/.bintray/.credentials"))

group = "io.megam"

bintray {
	user = bintray['user']
	key =  bintray['password']
  dryRun = false
  publish =  true
  publications =['sparkbb']
	pkg {
		repo = 'scala'
		name = 'sparkbuilder_2.11'
    userOrg = 'megamsys'
    group = 'io.megam'
		desc = 'Automated spark yonpijar builder using gradle tool for any git repo. Yonpis are templated machine learning scala code residing as separate Git.'
		licenses = ['Apache-2.0']
    websiteUrl = "https://www.megam.io"
		vcsUrl = 'https://github.com/megamsys/sparkbuilder.git'
		labels = ['spark', 'builder', 'gradle', 'spark']
		publicDownloadNumbers = true

	}
}

Refer sparkbuilder for the details on build.gradle

Now that we have loaded our bintray config, let publish jars to bintray.


gradle clean

gradle build

gradle bintrayUpload

Ok, verify the link https://dl.bintray.com/megamsys/scala/io/megam/sparkbuilder_2.11,

Cool the project is up there in bintray.

You can use it to your hearts content.

The federation is performed by OpenNebula platform. The OpenNebula is an Open-source software for manage virtualized data centers.The data centers are oversees private clouds, public clouds and hybrid clouds. It provides the service as High availability.

Here we are federating two already replicated Master Slave servers. to know how to replicate two servers refer the following article

https://blog.virtengine.com/2015/09/08/mysql-master-slave-replication/
Installing OpenNebula

before start to install OpenNebula verify the ruby installed with appropreate version for the Operating System

My System Configuration :

OS 				: 	Ubuntu 14.04
OpenNebula 	 :	 Version 4.12

My Servers

		Server 1: 192.168.1.12  (Master)
        Server 2: 192.168.1.13  (Slave)

the below Steps for Install OpenNebula occurding to my system configuration.

for Ubuntu 14.04 we need to install some packages before and after install opennebula that are

ruby2.0,ruby2.0-dev and ruby-dev

packages to be install.

Before install

apt-get -y install build-essential autoconf libtool make

apt-get -y install lvm2 ssh iproute iputils-arping

Install Opennebula

wget -q -O- https://downloads.opennebula.org/repo/Ubuntu/repo.key | apt-key add -

echo "deb https://downloads.opennebula.org/repo/4.12/Ubuntu/14.04 stable opennebula" > /etc/apt/sources.list.d/opennebula.list

apt-get -y update

apt-get -y install opennebula opennebula-sunstone

After install

echo "oneadmin ALL = (root) NOPASSWD:ALL" | sudo tee /etc/sudoers.d/oneadmin

apt-get -y install ntp

apt-get -y install ruby-dev

chmod 0440 /etc/sudoers.d/oneadmin

chmod 755 /usr/share/one/install_gems

sudo /usr/share/one/install_gems sunstone

Add ip and port of sunstone-server in conf

sed -i "s/^[ \t]*:host:.*/:host: $ipaddr/" /etc/one/sunstone-server.conf

start the Opennebula services

sunstone-server start  

econe-server start

occi-server restart

onegate-server restart

sudo -H -u oneadmin bash -c "one restart"

service opennebula restart

restart the Opennebula services

sunstone-server restart
econe-server restart
occi-server restart
onegate-server restart
sudo -H -u oneadmin bash -c "one restart"
sudo service opennebula restart

the above are installation process of OpenNebula

Configuration of OpenNebula Federation Master

OpenNebula uses the database sqllite by default but I use MySQL So I have to configure the OpenNebula database to MySQL Database.

First Install MySQL Server in your both server hosts

then create an user for OpenNebula federation

$ mysql -u root -p pswd

   mysql> create user 'oneadmin'@'%' IDENTIFIED BY 'oneadmin';
mysql> GRANT ALL PRIVILEGES ON opennebula.* TO ‘oneadmin’ IDENTIFIED BY ‘oneadmin’;

Configure OpenNebula to MySQL Database and set Federation Master and Zone id

$ nano  /etc/one/oned.conf

	#DB = [ backend = "sqlite" ]  >> Change as follow

	# Sample configuration for MySQL
	 DB = [ backend = "mysql",
   		     server  = "192.168.1.12",
		    port    = 0,
    		user    = "oneadmin",
    		passwd  = "oneadmin",
    		db_name = "opennebula" ]

	FEDERATION = [
			MODE = "MASTER",
			ZONE_ID = 123,
			MASTER_ONED = ""
		]

Save the conf file, after configuration

Remove the all auth files except one_auth, Before that you have to backup all the auth file.

Back up the all auth files form /var/lib/one/.one/ and remove all auth files except one_auth file.

Restart the service to get the new keys generated again:

After remove the file restart the services

sunstone-server restart
econe-server restart
occi-server restart
onegate-server restart
sudo -H -u oneadmin bash -c "one restart"
sudo service opennebula restart

Edit the local (master) Zone Endpoint by using the onezone command. You can also done this via your Sunstone UI.

$ onezone update 0

ENDPOINT = https://<192.168.1.12>:2633/RPC2

Create a Zone for each one of the slaves, and note down the new Zone ID.

$ nano /tmp/zone.tmpl

    NAME          = slave-one13
	ENDPOINT 	  = https://<192.168.1.13>:2633/RPC2

create your slave zone id by zone template file using blow command

$ onezone create /tmp/zone.tmpl  
   		ID: 100

To list your Zones

$ onezone list
ID 	 NAME  		    ENDPOINT
123	 OpenNebula  
100     slave-one13
Configure the OpenNebula Federation Slave

For each slave, follow these steps.

If it is a new installation, install OpenNebula as menstioned in above the installing OpenNebula guide.

To Configure OpenNebula Slave Server Use below steps:

$mysql -u root -p
mysql> GRANT ALL PRIVILEGES ON opennebula.* TO 'oneadmin' IDENTIFIED BY 'oneadmin';

and update oned.conf to use these values:

$ nano /etc/one/oned.conf
	# DB = [ backend = "sqlite" ] change as

	# Sample configuration for MySQL
 		DB = [ backend = "mysql",
    	server  = "192.168.1.13",
    	port    = 0,
    	user    = "oneadmin",
    	passwd  = "oneadmin",
    	db_name = "opennebula" ]

Configure OpenNebula to act as a federation slave. Don’t forget to use the Zone ID as you obtained when the zone was created.

FEDERATION = [
	MODE = "SLAVE",
	ZONE_ID = 100,
MASTER_ONED = "https://<192.168.1.12>:2633/RPC2"
	]

Copy the directory /var/lib/one/.one from the master host server to the slave host server. This directory and its contents must have oneadmin as owner. The directory should contain these files:

$ ls -1 /var/lib/one/.one
ec2_auth
occi_auth
one_auth
oneflow_auth
onegate_auth
one_key
sunstone_auth

Make sure one_auth (the oneadmin credentials) is present. If it’s not, copy it from master oneadmin’s /var/lib/one/.one/ to the slave oneadmin’s /var/lib/one/.one/.

Start the slave OpenNebula services.