Backup your data in a Cloud Storage - VirtEngine
Introduction
You want to backup your data in cloud and access it on need. Cloudberry backup desktop client can be used to backups files and folders on your Windows machine to our cloud storage - Atharva VirtEngine.
Introducing Atharva Storage - VirtEngine
Atharva Storage - VirtEngine is a “Cloud object storage, low latency and (S3 - AWS Signature v2) compatible API built on top of ceph - jewel.”.
 Upon successful signin to https://console.VirtEngine.com, look for the icon
at the top right hand corner named
Upon successful signin to https://console.VirtEngine.com, look for the icon
at the top right hand corner named Storage

This tutorial will guide you in setting up a Cloudberry backup tool for windows client on your windows 7+/10 workstation and connecting it to manage your atharva storage account in VirtEngine.
Prerequisites
-
You are running Windows 7 or later version. This was tested on Windows 10.
-
You have to create a valid credential for accessing https://console.VirtEngine.com. How to create an account with VirtEngine.
-
You have to create an atharva storage account with VirtEngine. How to create an atharva account with VirtEngine.
Connecting Cloudberry Backup Desktop client with Atharva (Ceph object storage) VirtEngine
This initial section contains everything you need to setup cloudberry backup tool for windows native client on your server.
Step-1 Download Cloudberry Backup Desktop client for windows
-
Go to this link. Cloudberry backup.
-
Click
Downloadbutton to start your download. -
Right-click the download file and install it in your windows system.
Step-2 Create the storage setting with VirtEngine
-
Once you successfully install CloudBerry, start up the application to display the
Welcomescreen. -
click the
Setup Backup Planbutton in the middle of the page -
CloudBerry has many options for backup targets. In this tutorial we’re focusing on
Amazon’s s3 compatiblecloud storage offerings. -
On the
S3 Compatible Storagetab specify Servie point as88.198.139.81. -
Enter the other details.
Display Name : Type a name for the accountAccess key Secret key -
You can see your
Access-keyandSecret-keyfrom yourprofile pagein MegamAfrica. (https://console.megamafrica.com)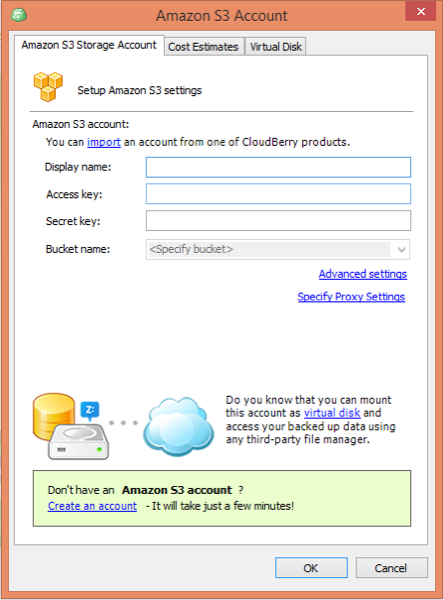
-
Click the “Advance Settings” and uncheck
Use SSLlink. Now you can see your bucket inBucket namebox. choose one of the bucket you want to backup. -
Next you’ll want to select your
backup modeas Simple. -
On the next page you’ll want to select your
Backup Source. Select your folder to connect with MegamAfrica storage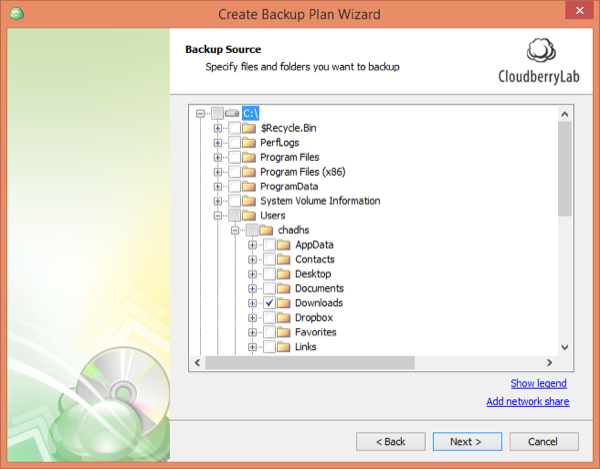
-
Once you see that your
Backup Planis successfully created, press “Finish” leaving the “Run backup now” box checked, to test your newly configured backup. -
From the Welcome screen you’ll be able to see that your backup is currently running, and some live summary information about the backup job.
Upload a file from cloudberry backup tool to VirtEngine
-
Copy the one or multiple files to upload/copy an upload folder if you want to upload a whole folder.
-
Paste into
Backup sourcefolder. The upload process will begin. -
Let us verify if the files is uploaded
Logon https://console.VirtEngine.com goto storage place. You can see your bucket, and the uploaded files are displayed.
Conclusion
These are the very simple steps to create a sync tool for an upload files using Windows native client using cloudberry backup to Atharva - VirtEngine.
This is a good head-start for using Cloudberry & our Athava ceph based object storage in VirtEngine.